Friday, July 31, 2009

TOY Clearance Sale!

You will soon find that Target is one of my favorite places to shop! Right now, it is the Target toy clearance event. They mark down their "summer" toys and "pre-Christmas" toys at 75% off! I have found some great, great deals in the past. It is SO tempting to drive myself down there today and go shopping, but I have vowed to have a simple, homemade Christmas this year. Happy Shopping! Post your great finds in the comment section. Enjoy!
P.S. Toys go VERY fast! Leave right now!

Thursday, July 30, 2009

Beanbag Balls

My son, Branson, loves ANYTHING to do with balls. As most of you know, I am going to attempt to make all of our Christmas gifts this year for my family. These balls are for a beanbag toss game that I am making. A cute drawstring bag to hold them in will finish off this project.
Supplies:
3- 9 or 11 inch latex balloons (3 balloons are needed per ball)
Rice or lentils
Scissors
Bag clip
Funnel
Step One:
Blow up one balloon. Use the bag clip to keep the air in the balloon. Let sit overnight to stretch the balloon out.
Step Two:
Take the remaining two balloons and clip off the "neck" part of the balloon. Set aside.

Step Three:
After letting the blown up balloon sit overnight, release the air. Stretch the opening over the funnel. Pour rice into funnel top. Pull down on balloon as you are filling it with rice. This will help get the maximum size for the ball.

Step Four:

Carefully cut the neck of the balloon off. Using one of the previously cut balloons, wrap around the filled balloon, sealing off the opening. Stretch the remaining balloon over the ball. You're done! These remind me of the stress-balls that they sell in the store. They are durable and lots of fun to play with. Have fun!

SHOPPING TIPS: This is a VERY cheap project! I bought a bag of 25 balloons for $.88! I had the rice at home, so this project was dirt cheap. Happy Shopping!


Wednesday, July 29, 2009

Quick Mini Pizzas

I love the smell of freshly-baked pizza dough, but sometimes I just don't have the time or energy for it. (Although, a yummy, healthy pizza dough recipe will be posted soon!) This recipe is a favorite of my kiddos and it is something that they can help make along with me. I hope your family enjoys it as much as mine does.


Ingredients:


Package of English Muffins


Shredded Cheese

(We like the Colby-jack cheese, but mozzarella or any of you favorite cheese will do.)


Any topping of your choice

(We are a boring family, so we usually just use ham or sausage)


1-batch of pizza sauce (recipe below)


1, 8oz. can tomato sauce

1/2 tsp. italian seasoning

1 tsp. onion powder

1/4 tsp. garlic powder

1/2 tsp. sugar

1/4 tsp. salt

dash of pepper

*Mix all ingredients together in a small bowl.*


Directions:


Cut english muffins in half using a butter knife. Mix up pizza sauce in a small bowl. Place english muffins on a cookie sheet. Turn oven to "broil." Place english muffins inside oven for 2-4 minutes. WATCH CLOSE! Carefully remove from oven and let cool enough to handle.


Once muffins are cool enough to touch, spoon pizza sauce over top of english muffins.


Add any toppings and sprinkle cheese on top.


Cover all of the english muffins with toppings. Place in a 375 degree oven for 8-12 minutes, or until cheese is melted. Carefully remove from oven. Enjoy!


*Disclaimer: do not allow children to place/remove items from the oven. This can result in serious burns. Allow english muffins to cool entirely before letting children add toppings and cheese. The pizzas will be very hot when removed from the oven, so be cautious when serving to small children.


Tuesday, July 28, 2009

Awesome Baby Wipes

Having two children in diapers and a preschooler who enjoys messes, baby wipes are always needed in our home. I have found that wipes are a necessity for any mom, but are an added expense that can add up quickly.

This recipe was given to me shortly after I had my first child. (Thanks Suzanne!) I'll admit that I was sceptical at first, but after trying it out, I was hooked! I have made my own baby wipes ever since!

Supplies:

One roll of high-quality paper towel
(I only use Bounty Select-a-Size, but any high-quality brand will work)

2 cups boiling water

2-3 tsp. favorite baby wash

Sharp, non-serrated knife

Tupperware-type container to hold wipes in

Directions:

Using a sharp, non-serrated knife, slowly cut the paper towel roll in half. (tip: I use more of a "pushing" motion rather than a sawing motion when cutting the paper towels. This will keep the paper towels from shredding when being cut.) I obviously didn't cut mine exactly in half.


Measure out 2 cups of water. Microwave water until it boils (approx. 5 minutes.) CAREFULLY remove water from microwave. SLOWLY pour in baby wash.

**If you pour baby wash in too quickly, it will boil over and may cause burns. Please be careful!!**

Place half of the paper towel roll in your container. Slowly poor the mixture over the wipes. Place lid on container. Let stand 5 minutes. (I purchased a wonderful container that has a vent in the lid. This prevents the lid from popping off due to the steam. If your container doesn't have a vent, simply tilt the lid.)
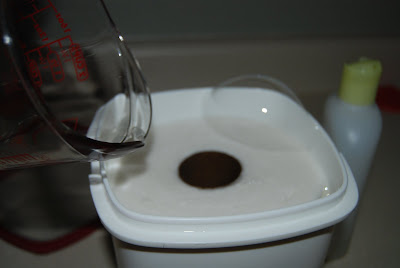
After 5 minutes, slowly pull the cardboard center from the wipes.All done! I throw away the first few wipes to remove the glue that held them on to the cardboard center.

Don't have a baby at home? Try making disinfectant wipes instead! Simply replace the baby wash with household bleach. They work just as well as name-brand wipes, but for a fraction of the cost.

SHOPPING TIPS: This recipe will save you so much money. I spend approx. $1.25 a month on wipes for my kids. Watch the sales and coupons and you will soon notice that the Bounty paper towels go on sale about every 2 weeks. When I find a really good deal, I stock up! Remember that each roll makes two batches of wipes.

Monday, July 27, 2009

PEDICURE IN A CAN

This post goes along with the Summer Toe Rings that were posted previously. I keep two or three of these on hand for quick gifts. You can decorate your can a lot cuter than the one shown here....I was running low on paper and supplies when I made this.

Supplies:

One large can of food

Can opener that cuts lid from the side

Pedicure items
(I usually put in lotion, toe rings, fingernail polish, file, toe separator, clippers and some cute toe stickers. Feel free to be as creative as you'd like!)

Colorful paper

Tape

Any embellishments you'd like to add (ribbons, tags, stickers, etc.)

Super Glue

Directions:


Take the can of food and open using a side-cutting can opener. Empty contents, remove label and wash thoroughly. Let dry.Gather your items to put inside the can.I use an empty lip-gloss container to put a few toe rings in so they don't get lost.


Cut the paper to fit around the can. Use tape to secure edges.


Fill can with items. You may add some tissue paper or paper shred to keep items from rattling around. Take lid and put super glue around the rim. Place back on can and press firmly for at least 60 seconds. Finish decorating can as desired. (I usually make a cute tag with the contents listed, add a fun eyelet and attach to a ribbon.)

*SHOPPING TIPS: I keep a stash of about 15 cans in all different sizes in a box downstairs. You can buy the contents for the can at almost any dollar store and you've been shown how to make the toe rings to go inside. Be creative and have fun with it!

*TIP: Start saving a few cans NOW to be used in a future post!

Sunday, July 26, 2009

How to Jump Start a Car

This post might seem silly to some of you, but sit back and ask yourselves, "If I were alone and had to ask a stranger to jump start my car, would I be able to do it?" If your answer is yes, then there is no need to read on, but if you answered, "no" or "maybe,"this will be a quick refresher course!


What you'll need:

Jumper cables

Car with a charged battery

Car with a dead battery


1. Bring the car with the charged battery as close as you can to the dead car.


2. Open the hoods on both vehicles.

3. Locate the batteries on both vehicles.


4. Get jumper cables and make sure that they can reach the batteries of both vehicles.
(if not, try to position car with the charged battery closer so the cables will reach.)


5. Take one of the red cables (+ positive) and attach to the battery of the dead car. Attach by clipping the positive (red) cable to the positive terminal post.
(this terminal usually has more corrosion than the negative terminal and will be indicated with a + sign. You may need to remove a cover from the terminal before attaching the jumper cable.)


6. Now, take the black (- negative) cable and clip it on to the negative (- black) terminal post of the dead car.

7. Repeat the same process on the car with the charged battery.


8. Start the dead car's engine. It should start within a few seconds.


9. Once the vehicle starts, remove the cables in reverse order, starting with the charged car and ending with the "dead" car.


*DURING THIS PROCESS, BE SURE THAT YOU DO NOT TOUCH THE CABLES TOGETHER.*

Saturday, July 25, 2009

Easy Summer Toe Rings

Summer is the perfect time to give yourself a pedicure and show off those wonderful feet! I love wearing my flip-flops and a coordinating toe ring. This post will show you how to make your very own "toe-bling" for a fraction of the cost. Enjoy!

Supplies needed:

*Elastic jewelry cord (approx. 6 inches)

*3 crimp beads

*Fun, colorful beads (small)

*Scissors or wire snips

*Crimper or needle-nose pliers


Directions:


Pick up the elastic cord and one crimp bead. Slide the crimp bead onto the cord. Leaving about a 2 1/2 inch tail behind the crimp bead, use your pliers to crimp the bead down.


Choose beads of your choice and thread them onto the elastic. (Make sure that the bead section isn't so long that it wraps around the sides of your toe.)


Thread on another crimp bead and clamp it down on the opposite side of the beads to make them secure.


Take the remaining crimp bead and thread both ends of the elastic cord through its center. Crimp down using pliers. Cut off excess cord.


Viola! You have an adorable toe ring! (I took a picture of my ring on my finger--after looking at the close-up picture of my toes, um, well, lets just say that it wasn't pretty!)


*SHOPPING TIPS: I bought the elastic cording at Joann's with their 50% off coupon that comes in each Sunday's paper. The total cost for the entire roll was around $2 after coupon. The crimp beads go on sale about every other week at Michaels and Roberts Crafts. They also put out a 50% off coupon each week that brings the price down to approx. $1.50 for 50 beads. Each toe ring costs about $.20 each---much cheaper than buying them in the store! Customize your own to fit your personality and style!

Friday, July 24, 2009

Why I LOVE Vinegar: bonus post!

Vinegar has to be one of the greatest products out there---and it's cheap! I don't know about you, but I use vinegar on a daily basis for all sorts of things. Here are a few of my favorite uses for this wonderful product. I use white, distilled vinegar in our home, but any kind will do. Just be careful as brown cider vinegar can stain some surfaces.


My Top 10 Uses for Vinegar


10. No-wax floor cleaner (for vinyl flooring.) Pour approx. 1 cup into a sink full of hot water. I sometimes add a few drops of dish soap to the water. Mop the floor as usual. Floor will dry nice and shiny when finished.

9. Remove hard water spots. Pour vinegar on to a rag or sponge. Rub hard water deposits until gone. I use this on my bathtub fixtures and my stainless-steel sink. LOVE it!

8. Laundry booster. Pour approx. 1/2 cup vinegar in to each load of laundry. It removes odors and eliminates the need for fabric softener. (This can take the "dish-rag" smell out of anything!)

7. Sink deodorizer. Pour approx. 1 cup of vinegar down the drain and let sit for 30-45 minutes. Rinse with water. We lack a garbage disposal at our house, so I do this once a week to maintain freshness. If you have a garbage disposal, make vinegar ice cubes and chop up in disposal. Rinse with cold water.

6. Deodorize toilet bowl. Pour approx. 2 1/2-3cups of vinegar in toilet bowl. Let stand for 45 minutes. Brush well. Flush.

5. Unclog shower heads or sink sprayers. Soak a rag in vinegar and wrap around shower head or sprayer. Let sit overnight. Rinse clean.

4. Window cleaner. Place vinegar in a spray bottle and spray directly on windows. Use old newspapers to dry for a sparkly shine!

3. Room deodorizer. Place in a spray bottle and lightly mist in the air. Works wonders!

2. Ant repellent. Spray vinegar around door frames, windows or other problem areas. You will need to reapply about every two weeks for best results.

#1. My all-time favorite use for vinegar.....Vinegar Taffy!! My Great Aunt Fran used to let me come over to make vinegar taffy with her. I absolutely love this recipe. Here it is....


2 cups sugar
2 tbsp. light corn syrup
2 tbsp. butter
1/2 cup white vinegar
1/8 tsp. cream of tartar
1/8 tsp. salt
Buttered cookie sheet
Butter for your hands
Scissors
Wax paper

Combine all ingredients in a saucepan. Mix until sugar is dissolved and it is no longer grainy. Cook until mixture reaches hard-ball stage (about 260 degrees.) Pour mix on to a buttered cookie sheet. Let cool until taffy can be handled. Butter hands very well. Pick up taffy and begin pulling until it turns light in color. Twist in to ropes. Cut ropes into sections using buttered scissors. Wrap in waxed paper. Enjoy!! (You may also add food coloring or an additional flavoring to this recipe.)

Grow Your Own Gifts

I love having fresh flowers for my kitchen table, but I refuse to pay outrageous prices at the floral shop. My solution: grow what you love!


Flowers make excellent gifts and the meaning is increased if they come from your own garden. For this post, I used an old quart-size canning jar, a simple piece of ribbon, tiny fill-beads (ones that you'd use in a stuffed animal,) and fresh-cut hydrangeas.


Directions:


Take canning jar and wash with warm soap and water. Rinse very well. Add 1-2 cups of the beads to the jar. (Use more if your flowers are very top-heavy and less if your flowers are delicate.)


Choose a ribbon that coordinates with the flowers. Tie around the jar.

Fill jar 1/2 full of water.


When cutting flowers, be sure to cut the stems on an angle. This will help them last longer. You may also add 1/2 can of sprite to the water to help them stay fresh.


Arrange flowers however you like. If flowers are top-heavy, you can use a small amount of floral tape around the stems to hold them in place.


*SHOPPING TIPS: I love giving fresh flowers as gifts to friends and family. When choosing plants to grow, make sure they are perennials. This will ensure a good crop each year and eliminate the need to replant each season. Also, look for plants that grow a lot of blossoms. This will allow you to cut the flowers periodically and still have your garden look nice. The total cost of this project ranges from free to under $1. Be creative when choosing your vases. Old jars, fish bowls, cups and even mugs work great for for flowers. May you find happiness in sharing something beautiful!

Thursday, July 23, 2009

"Quibs" (quick bibs)

As a mother of three, my "just-in-case" kids supplies can quickly over take my diaper bag. Don't get me wrong, I enjoy the idea of being prepared, but I love the concept of packing light. This next project achieves both of these ideals: Packing light and being prepared.

"Quibs"

Supplies needed:
10 in. of 1/4 inch ribbon (longer piece for older children)

2 small binder clips

Scissors

Low-temp glue gun

Lighter or a match


Felt scraps (optional)

Small buttons (optional)


Directions:

Using the lighter, lightly melt the ends of the ribbon to prevent fraying. (Sorry, no pics here. It is too hard to use fire and take pictures at the same time!)
*This step is optional and can be changed to suit your liking. I try to coordinate the embellishment to match the ribbon.*

Using the scissors, cut out small felt flowers. Sew the buttons on to each button.
(you may also glue them on, but I prefer the "hand-stitched" look.)


Now, wrap one end of the ribbon through the loop on the binder clip. Using the hot glue gun, secure the ribbon around the clip. Press firmly to seal. Repeat on other end, taking care to not to twist the ribbon.

Next, glue the flowers on to the ribbon, just above the clip.


That's it! Quick and easy. Stash these in your purse or diaper bag to have on hand. Simply clip on a napkin or paper towel and you are ready to go!
Photo of finished clip.

Variations to clips. The one on the left is for a boy. Feel free to email any photos of your own creations. Good luck!

*Disclaimer: These clips are not intended for newborn babies. Only use these with a child who can sit unassisted. Never leave baby alone with the clip, as it can become a choking hazard.*

SHOPPING TIPS: I purchased the binder clips in a 12 pack at our local dollar store on their "$.88 Tuesday" sale. The ribbon was purchased at Joann Fabrics for $1 per roll (4ft. per roll.) I had the buttons and felt lying around in the craft drawer. Watch sales for ribbon for the BEST pricing. My total cost per clip: $.35/each. ($.15 per set of clips and $.20 for ribbon)


Wednesday, July 22, 2009

Mormon in the Making

Welcome to "Mormon in the Making." I created this blog in response to my family and friend's constant questions and emails saying, "How'd you do that?"

The items published on this blog aren't fancy, expensive or complicated. In fact, you will find that most of my ideas are cheap-n-easy--just the way I like it. I am always looking for fun, new things to try, so if you have an idea, send it my way! Pictures and comments are always welcome.

At the end of each post, I will try to add a section called "Shopping Tips." This section will give tips, pointers and the average cost of the item made. This way, you can make your own projects for a fraction of the price!

I hope you enjoy your time on this site. Become a follower to stay updated on new postings. Thanks for looking and happy blogging!