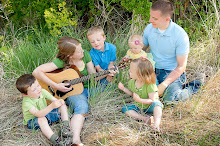
Family History has quickly become a passion in my life. I could spend hours pouring over journals, pedigree charts and photos from my grandparents and great-grandparents. I quickly realized that I haven't taken the time to create my own family story. Not really knowing where to start, I decided to have my family create their own time-capsule! For this project, we rented a canner from the Bishop's Storehouse and purchased a #10 can to put our items in. You may use any type of container you'd like--plastic, cardboard, wood, etc. Make sure the container you pick is sturdy and won't get lost easily.
Items Needed:
Sturdy container with lid
Personal documents
Anything you'd like to include!!
When we did our time capsule, we invited a few friends to join us with their families. This made it so much fun to get every one's ideas together. Here are a few items we put into our time capsule:
Hand prints: we traced each of our children's hand prints and wrote their names and ages on them.
Family Pictures: We took some quick family pictures in the backyard.
Family Facts: We wrote about each of our children and family members and highlighted any important events that were going on.
Pay Stubs: It will be fun to look back and *Hopefully* see how little we were making.
Grocery Ads: We pulled some ads from the newspaper to compare food prices.
Business Cards: We added business cards for Nick and I.
Family Budget: We put in a copy of our family budget to see where we spent our money.
Calendar: I added July's calendar to show how many activities we did in a typical week.
Other photos: We put recent photos of our family in the capsule like; pictures at the temple open house, our family reunion, the kids 6 mo, 2yr and 4yr photos, etc.

I made custom CD's for each of our families that listed our last name, the date of the time capsule and the family members names/ages. We then burned our family photos and other recent photos on the disc. This made it easier than putting actual photographs into the can, and hopefully the CD will hold up better over time.

We then packed our items gently into the can.

Nick took our cans downstairs and sealed them shut.

After our can was sealed, I took some scrapbook paper and covered the can. You can do whatever you'd like with your can---bury it, hide it, etc. We are going to place ours on the shelf with our food storage downstairs. I made a small tag to place on the can that lists the date of the time capsule so we don't forget!

That's it! This project was so much fun! If you are doing this for a family night lesson, we used the
Gospel Art Book and talked about Mormon abridging the plates, Moroni hiding the plates, Joseph Smith receiving the plates and then Joseph Smith translating the plates. We then talked about the importance of record keeping. We sang a few songs, made our time capsules and had a quick treat. Hopefully our friends had a good time too! :o)
 2. Starting with the cover, carefully lift off the picture. I had to peel the first two layers from my board book to get a smooth page.
 2. Starting with the cover, carefully lift off the picture. I had to peel the first two layers from my board book to get a smooth page.
 3. Repeat this process until the entire book is free of pictures.
 4. You know have your very own board book to do as you choose! I found that regular mod podge works the best. Use a strong glue to actually glue your photos or paper down and then use mod podge over the top. Be creative with this project--make a fun scrapbook, family history album, baby book or anything you'd like.